
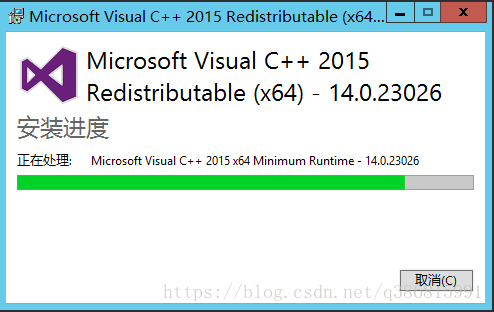
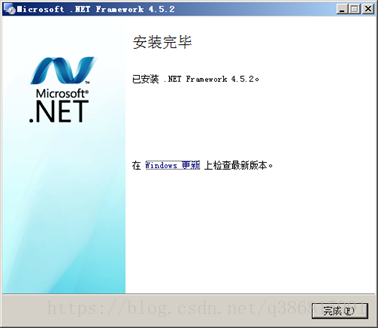
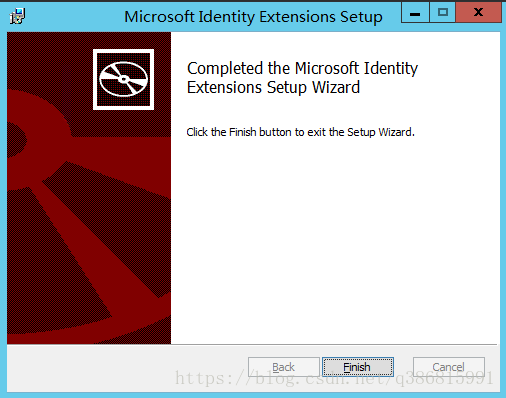
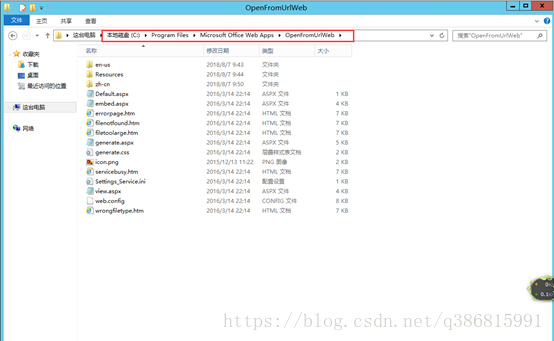

requirements
一. Web业务层安装
1. 更新操作系统依赖
yum update
yum upgrade
安装软件前记得关闭 SELinux
setenforce 0   # 该命令只是临时关闭selinux,重启系统后自动恢复

如需持久的关闭selinux,需修改/etc/selinux/config

创建存放web的根目录
mkdir -p /var/www/html
2. 安装PHP 7.3 + MariaDB 环境
2.1 使用IUS软件源
IUS 里有许多软件包与 EPEL 存在依赖项,因此需要同时添加 EPEL 源。
# 添加 EPEL 软件源
yum -y install https://dl.fedoraproject.org/pub/epel/epel-release-latest-7.noarch.rpm

# 添加 IUS 软件源
yum -y install https://repo.ius.io/ius-release-el7.rpm

# 开启 IUS 软件源
# yum --disablerepo="*" --enablerepo="ius"
yum-config-manager --enable ius-archive

# 安装查询工具
yum -y install yum-utils
2.2 安装nginx
EPEL 软件源里有 Nginx,并且版本不是太旧,这里直接从 EPEL 安装。
yum -y install nginx
安装后做以下基本配置。
修改 /etc/nginx/nginx.conf 配置文件。在 http{...} 内添加下面红色参数,以关闭 Nginx 版本号输出,延长 fastcgi 进程超时时间(避免 504 Gateway Time-out 问题),以及设置合适 buffer 值。
将/etc/nginx/nginx.conf中http块中的 server 配置项注释掉
http {
    ...
    sendfile            on;
    tcp_nopush          on;
    tcp_nodelay         on;
    server_tokens       off;
    fastcgi_read_timeout 300s;
    fastcgi_buffer_size 16k;
    fastcgi_busy_buffers_size 24k;
    fastcgi_buffers 8 16k;
    ...
}
继续修改这个配置文件,设置禁止以 IP 访问 Default Server。
cat << EOF >> /etc/nginx/conf.d/default.conf
server {
    listen 80 default_server;
    server_name _;
    return 444;
}
EOF
增加php-fpm的配置, 并将 example.com 替换成真实部署的域名
cat << EOF >> /etc/nginx/conf.d/web.conf

real_ip_header X-Forwarded-For;
set_real_ip_from 0.0.0.0/0;

set_real_ip_from 34.120.96.168;
real_ip_recursive on;

server {
    listen 80;
    server_name www.example.com;
    return 301 https://example.com$request_uri;
}

server {
    listen 80;

    server_name example.com;
    root /var/www/html;
    index index.php index.html index.htm;

    add_header X-Frame-Options "SAMEORIGIN";
    add_header X-XSS-Protection "1; mode=block";
    add_header X-Content-Type-Options "nosniff";
    add_header Strict-Transport-Security "max-age=31536000; includeSubDomains; preload" always;

    access_log /var/log/nginx/example_access.log;
    error_log /var/log/nginx/example_error.log;

    charset utf-8;

    error_page 404 /index.php;
    error_page 403 /index.php;

    proxy_send_timeout 300s;
    proxy_read_timeout 300s;

    resolver 8.8.8.8 ipv6=off;

    client_max_body_size 2M;
    client_body_buffer_size 128k;

    #forbidden wget/curl/scrapy etc.
    #if ($http_user_agent ~* (Scrapy|Curl|Wget|HttpClient)){
    #    return 444;
    #}

    location / {
        try_files $uri $uri/ /index.php?$query_string;
    }

    location = /favicon.ico {
        access_log off;
        log_not_found off;
    }

    location = /robots.txt {
        access_log off;
        log_not_found off;
    }

    #location ~ ^/(index|clientarea|cart|logout|submitticket|supporttickets|serverstatus|aff|affiliates|register|login|contact|viewticket|viewinvoice|dl|payssion|paypalwebhooks)\.php {
    location ~ \.php$ {
        fastcgi_pass unix:/dev/shm/php-fpm.sock;
        fastcgi_send_timeout 300;
        fastcgi_read_timeout 300;
        fastcgi_index index.php;
        fastcgi_param SCRIPT_FILENAME $document_root$fastcgi_script_name;
        include fastcgi_params;
    }

    location /admin/images {
        expires 1M;
        access_log off;
        add_header Cache-Control "public";
    }

    location /admin/templates {
        expires 1M;
        access_log off;
        add_header Cache-Control "public";
    }

    location /admin {
        if (-d $request_filename){
            rewrite ^/(.*)([^/])$ $scheme://$host/$1$2/ permanent;
        }
        fastcgi_pass unix:/dev/shm/php-fpm.sock;
        fastcgi_send_timeout 300;
        fastcgi_read_timeout 300;
        fastcgi_index index.php;
        fastcgi_param SCRIPT_FILENAME $document_root$fastcgi_script_name;
        include fastcgi_params;
    }

    location ~ /\.(?!well-known).* {
        return 444;
    }

    location ~ /\.ht {
        return 444;
    }

    location /assets {
        expires 1M;
        access_log off;
        add_header Cache-Control "public";
    }

    location /modules {
        expires 1M;
        access_log off;
        add_header Cache-Control "public";
    }
    location /templates {
        expires 1M;
        access_log off;
        add_header Cache-Control "public";
    }

    location ~* \.(?:jpg|jpeg|gif|png|ico|cur|gz|svg|svgz|mp4|ogg|ogv|webm|htc|svg|woff|woff2|ttf)\$ {
        expires 1M;
        access_log off;
        add_header Cache-Control "public";
    }

    location ~* \.(?:css|js)\$ {
        expires 7d;
        access_log off;
        add_header Cache-Control "public";
    }
    location ~* \.(tpl|inc|cfg)$ {
        deny all;
    }
}
EOF
2.3. 安装 MariaDB
CentOS 默认软件源里的 MariaDB 版本太旧,这里从 IUS 源安装。
软件查询方法:先用 yum search 关键词 搜索相关软件,知道软件名后再安装,
yum -y install mariadb104-server
运行 MariaDB 并设置开机启动。
systemctl start mariadb
systemctl enable mariadb
运行初始化脚本设置数据库 root 密码,以及删除默认测试账户和数据库。
mysql_secure_installation
提示输入 root 密码,由于我们刚安装完没有设置,直接按 Enter 进入下一步。
Enter current password for root (enter for none):
按提示设置 MariaDB root 账户密码,选择 Y 回车后输入两遍密码完成设置。
Set root password? [Y/n]
接下来的几个选项都选Y,这将删除测试账户和数据库,以及禁用远程 root 登录并刷新权限表。
Remove anonymous users? [Y/n]
Disallow root login remotely? [Y/n]
Remove test database and access to it? [Y/n]
Reload privilege tables now? [Y/n]
至此,MariaDB 初始化安全配置完成。
2.4 安装 PHP
PHP 也从 IUS 安装。下面命令安装了 FastCGI, MySQL 及其它常用 PHP 模块,过程中会将 PHP 核心软件包作为依赖项安装。
php 8 install
yum -y install https://mirrors.aliyun.com/remi/enterprise/remi-release-7.rpm
yum -y install yum-utils
 yum repolist all |grep php
yum-config-manager --enable remi-php80
 sudo yum install  php-cli php-fpm php-mysqlnd php-zip php-devel php-gd php-mbstring php-curl php-xml php-pear php-bcmath php-json php-redis  --skip-broken
yum -y install php72u-fpm php72u-mysqlnd php72u-common php72u-cli php72u-gd php72u-opcache php72u-mbstring php72u-json php72u-pecl-redis php72u-process php72u-xml php72u-pecl-zip php72u-bcmath php72u-soap php72u-xmlrpc php72u-devel
更改 PHP 配置文件,调整一些常见参数值。
# 启用 cgi.fix_pathinfo 并将值设为 0(防范 PHP 解释器被欺骗执行恶意文件)
# sed -i 's|^;cgi.fix_pathinfo.*|cgi.fix_pathinfo=0|' /etc/php.ini

# 将文件上传大小限制增加至 20M 和 80M
sed -i 's|^upload_max_filesize.*|upload_max_filesize = 20M|' /etc/php.ini
sed -i 's|^post_max_size.*|post_max_size = 80M|' /etc/php.ini

# 将每个脚本内存最大用量增加至 256M
sed -i 's|^memory_limit.*|memory_limit = 256M|' /etc/php.ini

# 设置记录错误日志类型
sed -i 's|^error_reporting.*|error_reporting = E_WARNING \& E_ERROR|' /etc/php.ini

# 定义日期函数默认时区
sed -i 's|^;date.timezone.*|date.timezone = Asia\/Shanghai|' /etc/php.ini

# 关闭 PHP 版本号输出
sed -i 's|^expose_php.*|expose_php = Off|' /etc/php.ini
更改 PHP-FPM 配置文件,调整一些常见参数值。
# 将用户/组改为 nginx
sed -i 's|^user =.*|user = nginx|' /etc/php-fpm.d/www.conf
sed -i 's|^group =.*|group = nginx|' /etc/php-fpm.d/www.conf

# 将通信方式改为 UNIX Socket
sed -i '/listen = 127.0.0.1:9000/ s/^/;/' /etc/php-fpm.d/www.conf
sed -i '/;listen = \/run\/php-fpm\/www.sock/ s/^;//' /etc/php-fpm.d/www.conf

# 为 UNIX Socket 添加 Nginx 用户权限(需 POSIX ACL 支持,CentOS 7 默认启用。如不支持请设置 listen.owner、listen.group 和 listen.mode 参数,以确保 Nginx 有权限读写 UNIX Socket)
sed -i '/;listen.acl_users = nginx/ s/^;//' /etc/php-fpm.d/www.conf

# 将工作进程 stdout 和 stderr 重定向到错误日志
sed -i '/;catch_workers_output = yes/ s/^;//' /etc/php-fpm.d/www.conf

# 设置日志级别记录错误
sed -i 's|^;log_level.*|log_level = error|' /etc/php-fpm.conf

# 将 php-fpm 日志目录用户/组改为 nginx
chown -R nginx:nginx /var/log/php-fpm


# mkdir -p /var/www/html/attachments /var/www/html/attachments/projects /var/www/html/downloads /var/www/html/templates_c


# chmod 777 -R /var/www/html/downloads
# chmod 777 -R /var/www/html/attachments
# chmod 777 -R /var/www/html/templates_c
2.4.1 添加定时任务
# 添加 Cron 计划任务
crontab -e

# 设置每 5 分钟运行 Cron 作业
*/5 * * * * /usr/bin/php -q /var/www/html/crons/cron.php
2.4.1 安装PHP ioncube插件
安装 Ioncube 插件
# 下载 Ioncube 并解压到当前目录
wget https://download.zxypic.com/ioncube_loaders_lin_x86-64.tar.gz
tar -zxvf ioncube_loaders_lin_x86-64.tar.gz

# 复制插件文件到 PHP 扩展目录(选择与 PHP 版本相符或接近的版本)
# 可通过 php -i | grep extension_dir 查询当前 PHP 扩展目录路径
cp -Z /var/www/ioncube/ioncube_loader_lin_7.2.so /usr/lib64/php/modules

# 赋予插件文件可执行权限
chmod +x /usr/lib64/php/modules/ioncube_loader_lin_7.2.so

# 创建配置文件让 PHP 加载插件(可通过 php -i | grep 'additional .ini files' 查询当前 PHP 配置文件目录)
echo "zend_extension=/usr/lib64/php/modules/ioncube_loader_lin_7.2.so" > /etc/php.d/00-ioncube.ini

# 删除之前操作留下的多余文件
rm -rf /var/www/ioncube /var/www/ioncube_loaders_lin_x86-64.tar.gz

# 重启服务生效
nginx -s reload
systemctl restart php-fpm

# 验证 Ioncube 有无安装成功
php -v
启动 php-fpm 服务并设置开机自启。
systemctl start php-fpm
systemctl enable php-fpm
2.5 PHP与Nginx的反代运行环境测试
cat << EOF >> /var/www/html/index.php
<?php

echo phpinfo();
EOF
本配置中会将HTTP请求 重定向到 HTTPS请求, 该操作使用CloudFlare的开启始终HTTPS访问 即可, 如CDN无该功能,可使用acme.sh自己签发HTTPS证书.
通过浏览器访问 https://example.com 是否有显示PHP的环境信息
2.6 导入数据库
2.7 导入webportal
将webportal.zip解压到/var/www/html中,并修改configuration.php中的数据库配置,如下字段
$db_username = 'root';
$db_password = '1234#Asd';
$db_name = 'web';
2.8 开启linux防火墙
将该机器仅仅开启 80端口外网访问
systemctl enable firewalld
systemctl start firewalld

firewall-cmd --all-port=80/tcp --permanent
firewall-cmd --reload
2.9 配置完成,进入后台 进行基础设置
https://example.com/admin
为了安全起见, 建议将/admin 路径进行IP白名单设置
二. 资源层安装
2. 部署方式
1. 支持主从集群配置 资源需求
    1.1 (master)一台 1C/2G/50G + 虚拟机即可
    1.2 (slave)N台 能开启KVM硬件虚拟化的 节点(存储建议单独增加硬盘,网络必须能与master通信,其它配置不限)
2. 支持单机配置 资源需求
    2.1 一台 能开启KVM硬件虚拟化的 机器(存储建议单独增加硬盘, 其它配置不限)
3. 安装步骤
上述2种方式相同,都是执行如下命令
wget https://files.begincloud.cn/install.sh; chmod 0755 install.sh; ./install.sh email=tony@example.com
有一点不同的是, 集群安装时, 上述命令在 所有slave机器中 也需安装
4. 下载镜像
将下载后的镜像 解压到 /var/virtualizor/kvm/目录下

wget https://download.zxypic.com/qcow2/centos-7.6-x86_64.img.tar.gz
wget https://download.zxypic.com/qcow2/centos-7.9-x86_64.img.tar.gz
wget https://download.zxypic.com/qcow2/centos-8.2-x86_64.img.tar.gz
wget https://download.zxypic.com/qcow2/centos-8-x86_64.img.tar.gz
wget https://download.zxypic.com/qcow2/debian-10-x86_64.img.tar.gz
wget https://download.zxypic.com/qcow2/debian-11-x86_64.img.tar.gz
wget https://download.zxypic.com/qcow2/debian-9.4-x86_64.img.tar.gz
wget https://download.zxypic.com/qcow2/ubuntu-18.04-x86_64.img.tar.gz
wget https://download.zxypic.com/qcow2/ubuntu-20.04-x86_64.img.tar.gz
wget https://download.zxypic.com/qcow2/ubuntu-22.04-x86_64.img.tar.gz